 By Graham Fisher
The Manduca baby carrier in petrol is a soft structured carrier that many parents choose for daily wear, and this guide will walk you through what the colorway means, how to check whether it fits your body and your baby, and how to set it up so you can carry comfortably and safely. By the end, you should be able to pick the right size, adjust the straps correctly, and avoid the setup errors that cause most discomfort.
What “Petrol” Means for Manduca Carriers
Petrol is one of the deep blue-green shades in the Manduca lineup. Colorways like this are a cosmetic choice: the carrier’s structure, buckle system, and weight limits do not change based on color. That matters because some shoppers assume a specific shade comes with different features or older stock. Before you buy, check the model name printed on the label or product listing so you know whether you are looking at the original Manduca, a newer version, or a related model. Specs such as recommended baby weight range and the number of carry positions are set by the model, not the color.
Shopping for one? See our guide: Baby Bjorn Baby Carrier Review: Pros and Cons.
Manufacturers generally specify carriers for use from a newborn stage with an insert, through toddler years, with a maximum weight that usually falls in the mid-range for soft structured carriers. Read the current weight limit on the manufacturer’s site before you assume it fits your child’s age.
Step 1: Check Whether the Carrier Fits Your Body
Fit is the most common reason parents return a carrier. Soft structured carriers use a waistband and shoulder straps that need to sit in the right places, and a poor match often shows up as pressure on the lower back or straps slipping off the shoulders.
Measure Your Torso and Waist
Measure your natural waist, which is the narrowest part of your torso, usually just above the belly button. Then measure from your shoulder to your hip if you can, since the waistband should sit on your hip bones rather than your ribs. Compare these numbers with the size chart on the manufacturer’s site, because sizing for this type of carrier is based on body dimensions rather than dress size.
Consider Your Height and Frame
Shorter parents may find that the shoulder straps cross too high on the back, and taller parents may find the waistband rides up. If you are at the smaller or larger end of the chart, consult the sizing notes about adjustable straps before deciding.
Step 2: Gather What You Need Before Your First Use
Preparing your space and equipment makes the first session much easier. You do not need special tools, but a few items help.
- The carrier itself, with all panels, buckles, and straps present and undamaged
- The manufacturer’s instruction booklet or the current online instructions
- A mirror, so you can check strap placement from the front and sides
- A clear, firm surface for practice, such as a bed or sofa
- A helper for your first few attempts, especially with a baby
Step 3: Set Up the Carrier for Your Baby
Setup determines comfort for both of you. Most parents struggle with three things: the waistband height, the shoulder strap position, and the leg openings.
Adjust the Waistband
Fasten the waistband so it sits on your hips rather than your waist. It should be snug enough that the weight of the carrier does not hang from your shoulders. Tighten it fully before you put your baby in, since a loose waistband shifts weight to your back.
Set the Shoulder Straps
Adjust the shoulder straps so they run from the top of the carrier body up and over your shoulders without crossing your neck. Leave enough slack that you can still move your arms, but not so much that the panel sags.
Position Your Baby Safely
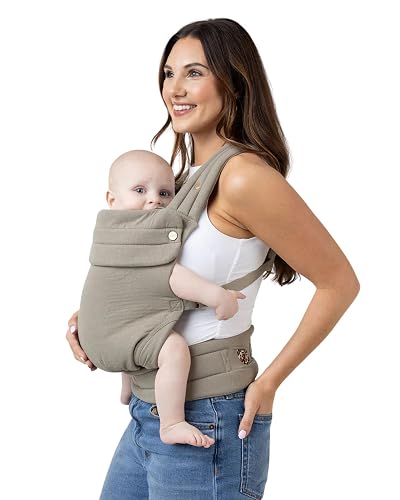
For a newborn, use the insert and keep your baby in an upright position with the chin off the chest. Their knees should sit higher than their bottom in a spread-squat position, and their back should be supported. Make sure the airway stays clear at all times and that you can see your baby’s face easily. For forward-facing use, review the separate forward-facing guide before carrying, since that position requires extra attention to the baby’s support and hip development.
Step 4: Check Your Setup Regularly
Straps and buckles can loosen during a long walk or errand. Check the waistband, shoulder straps, and buckles every time you put the carrier on, and recheck after you have been moving for a while. Confirm that your baby is still visible and breathing freely after every adjustment.
Common Mistakes to Avoid
- Wearing the waistband too high. This loads your shoulders and upper back instead of your hips.
- Leaving the shoulder straps loose. The carrier will sag and the baby will shift away from your body.
- Using the insert past the manufacturer’s stated age or weight. Follow the limits in the instructions.
- Forgetting to check the buckles. Snap each buckle and tug gently before lifting your baby.
- Carrying a baby who is not supported in the right position. Keep the chin off the chest and the airway clear.
Tips for Everyday Comfort
Start with short carries around the house so you can learn the feel of the carrier before you head out. Rotate your strap positions occasionally on long days to spread pressure. Pair the carrier with supportive shoes, since your center of gravity shifts when you carry a child. If you have a larger baby, check the carrier’s weight limit before each new stage, and consider a second carrier for toddler years if the first one no longer fits well.
Recommended gear
A few accessories can make a Manduca easier to use day to day.
- Manduca Newborn Insert. Designed to support a small baby’s body and head in the early months, so the carrier fits more securely from the start. View on Amazon
- Manduca Baby Carrier Bib. A cover that protects the carrier from drool and spit-up, making cleaning simpler. View on Amazon
- Baby carrier hip support pad. Adds padding under the waistband for extra comfort on long walks. View on Amazon
Related Reading
If you are still deciding which style suits your routine, compare options in Baby Carrier Types: Structured, Wrap, Ring Sling and Backpack before buying. For forward-facing setup specifics, read Manduca Baby Carrier Forward Facing: Safe Setup Steps for Babies. Parents who plan to carry on longer walks should also review Walking with Baby Carrier: A Step-by-Step Guide for Comfort and Safety, and anyone wearing a carrier daily can compare fit across brands in Best Baby Carriers: 5 Soft Structured Carriers Compared.
FAQ
Is the petrol colorway different from other Manduca colors?
No. Petrol is a color choice only. Weight limits, sizing, and features are determined by the model, so check the product name and specifications rather than the shade.
What size should I choose?
Compare your waist and hip measurements with the manufacturer’s current size chart. Do not rely on dress size alone, because carriers are fitted to body dimensions.
When can I start using the carrier with a newborn?
Use the newborn insert as the manufacturer directs, and follow their guidance on the minimum weight and age. Keep the baby upright with the airway clear.
How do I know the carrier is set up safely?
Your baby should be upright and visible, with the chin off the chest, the airway clear, and the knees higher than the bottom. Check that all buckles are fastened and the waistband sits on your hips.
Can I use it for long walks?
Yes, many parents use soft structured carriers on longer outings. Recheck straps and buckles during the walk, and take breaks to adjust.
What should I do if the carrier hurts my back?
Check that the waistband sits on your hips and the shoulder straps are not too tight or too loose. If pain persists, consult a physical therapist or your healthcare provider.
Should I get professional help with fitting?
If you are unsure about newborn positioning, fit, or any health concern, consult a certified babywearing educator, your pediatrician, or the manufacturer’s customer support.
Conclusion
Choosing a Manduca carrier in petrol comes down to the model, your body measurements, and careful setup rather than the color itself. Measure your waist and hips, set the waistband on your hips, position your baby upright with the airway clear, and check the buckles every time. With those steps in place, you can carry comfortably for everyday errands and longer outings alike.
Related reading
Ready to choose one?
About Graham Fisher
Graham Fisher is part of our editorial team and reviews and edits our baby gear guides, checking product details against manufacturer specifications and owner feedback.









Write Your Review
No reviews yet. Be the first to share your experience!