 By Graham Fisher
Updated November 2026
A baby carrier and a Pavlik harness are not designed to be used as a combined system without medical guidance, and this guide explains why that matters. Baby carrier Pavlik harness questions usually come from parents whose infant has been prescribed a Pavlik harness for hip dysplasia and who want to keep the baby close while staying within the treatment plan. By the end, you will understand what a Pavlik harness does, which carrier features tend to be compatible with it, how to check fit and positioning, and which questions to bring to your orthopedic provider before you wear your baby in any carrier.
Important: A Pavlik harness is a medical device used to hold a baby’s hips in a specific position while the joints develop. Any decision about carrying a baby in a harness should be made with the pediatric orthopedic specialist or pediatric physical therapist who prescribed it. Use this article as a planning aid, not as a substitute for that advice.
Shopping for one? See our guide: Baby Bjorn Baby Carrier Review: Pros and Cons.
What a Pavlik Harness Does and Why Carrier Use Is Limited
A Pavlik harness is a soft, adjustable device made of straps that holds the hips flexed and the thighs abducted, typically for infants diagnosed with developmental dysplasia of the hip (DDH). Its job is to keep the femoral head seated in the hip socket while the joint matures. Because the harness holds the legs in a fixed position, the infant’s hip angle and leg alignment are controlled around the clock, except during the times the treating clinician allows the harness to be removed for hygiene.
This is why carrier use needs careful review. A standard soft carrier may press the legs into a position that is not the one prescribed, may compress straps against the harness, or may require the baby’s legs to hang in a way the harness was meant to prevent. Some families are told to keep the baby in the harness and use a carrier only in limited ways; others are given specific instructions for leg position. The rules differ by case, so the prescribing team’s written guidance matters more than any general rule you read online.
Step 1: Get the Clinical Instructions in Writing
Before you buy or test any carrier, schedule a short conversation with the clinician managing the harness. Ask them to write down what is allowed. Clear instructions usually cover the points below.
- Whether the harness stays on during carrier use, or must be removed
- Maximum time per session in any carrier
- Required leg position in the carrier (for example, whether the legs can hang straight down or must stay spread)
- Whether front, back or hip carry is permitted
- Signs that the hip position has changed and you should call the clinic
- How often the harness should be checked and adjusted at follow-up visits
Keep these notes with the harness. If a daycare worker, grandparent or other caregiver will use a carrier, give them a copy too.
Step 2: Choose a Carrier Type That Can Accommodate Leg Position
Carrier style matters more than brand when you are working around a harness. Carriers fall into a few general families, and each handles leg position differently. Ask your clinician which of these structures, if any, is acceptable for your baby’s case.
| Carrier type | How legs are positioned | Questions to raise with your clinician |
|---|---|---|
| Soft-structured carrier with wide leg openings | Legs are held by fabric panels; openings can be adjusted | Can the panels be set to keep legs spread at the required angle? |
| Ring sling | Baby sits in a fabric pouch; legs are free to hang | Is a fully seated, legs-free position allowed given the harness? |
| Wrap carrier | Fabric is wrapped in a custom pattern; leg position depends on how it is tied | Can the wrap be tied to hold the required leg angle? |
| Hip carrier | Baby sits on the hip with legs wrapped around the carrier | Is a straddle position appropriate, or does it conflict with abduction goals? |
| Stroller or car seat | Position is set by the seat or stroller | Does the harness fit the seat or stroller, and does the seat hold the legs correctly? |
Many people compare carriers by comfort or weight distribution alone. With a harness, the first filter is always leg position. Once you have an approved structure, you can compare other features. For broader background on carrier positions, see Proper Baby Carrier Position vs Wrong Position: Which Should You Choose? and Ring Sling Baby Carrier Positions: A Step-by-Step Guide for Safe Wear.
Step 3: Check the Fit With the Harness On
A carrier that fits a baby without a harness may not fit the same baby with one. The harness adds bulk at the hips, thighs and torso, so test everything with the harness in place. Do this with a doll or a stuffed toy first if your clinician allows practice runs, then with the baby under supervision.
Fit checklist
- Confirm the harness straps are not pinched, twisted or compressed by carrier fabric.
- Check that the baby’s thighs stay in the angle your clinician specified.
- Look for any pressure points at the knees, ankles or feet.
- Make sure the baby’s spine and head are supported, and that the chin is not pressed toward the chest.
- Confirm the baby’s airway is clear and the face is visible at all times.
- Make sure the carrier does not force the hips into adduction (legs pressed together).
Measuring leg spread
If your clinician gives a target angle, you can check it roughly by placing a flat ruler or your hand along the thigh and comparing it to the position shown in the instructions. Do not attempt to measure precise angles on your own unless the clinician has shown you how. Small changes matter, and a photo taken at the clinic can serve as a reference.
Step 4: Build a Safe Routine for Carrier Sessions
Once a carrier is approved, follow a routine that keeps the baby safe and comfortable. Plan short sessions at first, and watch the baby closely during each one.
Before each session
- Check the harness straps and buckles.
- Check the carrier’s fabric and buckles for wear.
- Confirm that the baby’s diaper is clean and dry, so you do not need to undo the harness in the carrier.
- Have a plan for a quick break if the baby becomes fussy or the position shifts.
During the session
- Stay upright and keep the baby’s head above the level of your heart if possible, which helps with breathing.
- Check the baby’s face and breathing regularly.
- Watch the legs and hips for changes in color, swelling or fussiness that seems to come from one side.
After the session
- Remove the baby and look at the harness straps, skin and leg position.
- Note any redness, rubbing or changes you saw, and mention them at the next visit.
For guidance on general carrier safety, including breathing and head position, see Walking with Baby Carrier: A Step-by-Step Guide for Comfort and Safety.
Step 5: Plan for Cleaning and Skin Care
A harness must be kept clean and dry, and the carrier must be kept clean as well. Sweat, milk and diaper leaks can build up at the straps and under the carrier panels, and that can irritate the skin. Follow the harness manufacturer’s and clinic’s cleaning instructions. Many carriers can be washed, but you should confirm the care label before using any cleaning method, and some carriers should not be soaked. If you need a specific cleaning method, see Washing Baby Bjorn Carrier One: 5 Best Options for Easy Cleaning (2026) for an example of how carrier cleaning guidance is usually structured.
Common Mistakes
- Assuming a carrier that works for another baby will work for yours. Harness position and hip condition vary, so check every carrier against your own clinician’s instructions.
- Letting the legs fall into a pressed-together position. Many carriers encourage this, and it can work against the goal of the harness.
- Carrying too long without a break. Long sessions make it harder to notice early skin or position problems.
- Tightening carrier straps over the harness. This can compress the harness and change its fit.
- Skipping the follow-up. Bring the harness, the carrier and any notes to each appointment so the clinician can check fit.
Tips for Caregivers and Other Adults
If more than one adult will carry the baby, teach each person the approved position and the signs to watch for. Practice with a doll before the first real session, and make sure everyone knows when to stop. Keep a printed copy of the clinician’s instructions in the diaper bag. Many parents also find it helpful to take a short video of the correct position from the clinic to use as a reference at home.
Recommended gear
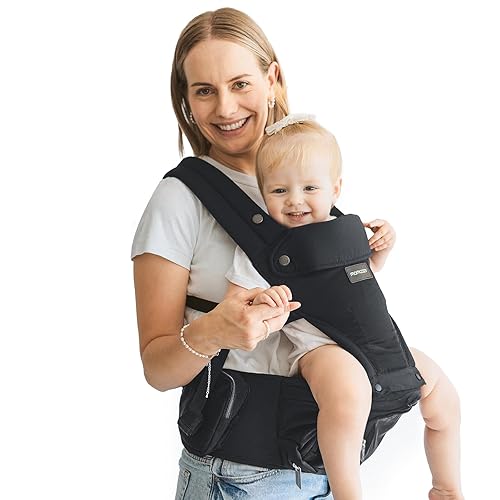
- Soft-structured carrier with adjustable leg panels: Look for one with leg openings that can be set wider, because this gives more room for a harness and for a required leg angle. View on Amazon
- Harness-compatible carrier cover: A simple cover can protect carrier fabric from milk and sweat, which helps with cleaning. View on Amazon
- Carrier-safe baby mirror: A small mirror attached to a stroller or car seat lets you see the baby’s face during car or stroller use. View on Amazon
FAQ
Can I use a baby carrier while my baby is in a Pavlik harness?
Sometimes, but only if the prescribing clinician approves the specific carrier and the way you will use it. Get written instructions before you try any carrier.
Should the harness come off for carrier use?
That depends on the treatment plan. Some clinicians allow the harness to stay on, while others want it removed or changed for carrier use. Ask directly, and do not make this decision on your own.
What leg position is usually required?
Many harnesses are designed to hold the hips flexed and the thighs spread. The exact angle is set by the clinician, and it should be checked at each visit.
How long can my baby stay in a carrier?
There is no universal time limit. Your clinician will give a maximum for your baby’s case. Take frequent breaks and check the baby often.
What should I do if the straps rub or the skin looks red?
Remove the baby from the carrier, check the straps and skin, and call the clinic. Do not continue the session if you see new redness, swelling or signs of pain.
Can I use a stroller or car seat with a harness?
Many families do, but the seat or stroller must allow the required leg position. Confirm with your clinician and check the car seat manufacturer’s instructions for harness compatibility.
Do I need to re-check the fit as my baby grows?
Yes. Babies change size quickly, and the harness and carrier fit can change within weeks. Re-check at every follow-up and whenever the baby’s weight or length changes noticeably.
Who should I call if I am unsure?
Contact the pediatric orthopedic clinic or the pediatric physical therapist who manages the harness. If your baby shows signs of breathing trouble, color change or severe distress, seek emergency care right away.
Conclusion
Using a baby carrier with a Pavlik harness is possible only when the treating team approves a specific carrier and leg position. Start by getting written instructions, choose a carrier type that accommodates the required angle, and test the fit with the harness in place. Keep sessions short, check the baby often, and bring your notes to every follow-up appointment.
Ready to choose one?
About Graham Fisher
Graham Fisher is part of our editorial team and reviews and edits our baby gear guides, checking product details against manufacturer specifications and owner feedback.








Write Your Review
No reviews yet. Be the first to share your experience!