 By Graham Fisher
A Baby Bjorn carrier with anchor is a system where a removable attachment, often called an anchor or tether strap, connects the carrier to a fixed point so the carrier stays secure and stable during use. This guide walks you through what the anchor does, how to set it up, how to check that the fit is right for your baby and body, and which mistakes to avoid. By the end, you should be able to attach the anchor correctly, adjust the carrier for a snug and supportive fit, and know when to stop and reassess.
What the Anchor Does and Why It Matters
Most Baby Bjorn carriers are designed to be worn without any extra attachment, but the anchor concept adds a second point of control. Some carriers in the brand’s lineup use a removable strap or clip system that connects to a stable part of the carrier or to a secondary strap, reducing the amount of sway and shifting that can happen when you bend, climb stairs or move quickly. Manufacturers typically describe the anchor as a way to keep the carrier from drifting out of position, which matters most for babies who are wriggly or older and heavier.
Shopping for one? See our guide: Baby Bjorn Baby Carrier Review: Pros and Cons.
Before you start, confirm which model you have. Not every Baby Bjorn carrier includes an anchor, and the attachment design differs between models. Check the included parts against the product listing, and if anything is missing, contact the manufacturer for replacement parts rather than improvising. For details on finding the correct instructions for your specific model, see Baby Bjorn Carrier Original Manual (2026): Where to Find It and How to Use It.
Tools and Items You Need Before You Start
Setting up the anchor takes only a few minutes, but having the right items ready makes the process smoother and helps you avoid rushing.
- Your Baby Bjorn carrier with all original straps and the anchor component
- The manufacturer’s instruction booklet or a downloaded copy for your model
- A flat, clear surface such as a bed or sofa for the first setup
- A mirror, so you can check strap positions from the front and back
- A second adult if you are learning a new model, since helpers can check alignment more easily
- Your baby’s current weight and a note of the carrier’s listed weight and height range
Step-by-Step: Attaching the Anchor
The exact sequence varies by model, so always follow your manual. The general process below applies to most anchor-style setups.
Step 1: Lay Out the Carrier and Identify the Anchor Points
Spread the carrier flat and locate the anchor point, which is usually a reinforced loop, buckle or strap end. Make sure the webbing is not twisted and that the buckles are not caught under fabric. A twisted strap can cause uneven load distribution once you are wearing the carrier.
Step 2: Connect the Anchor Component
Attach the anchor piece to the designated point. Press or thread it until you hear or feel it lock, then give it a firm tug in two directions. If it slides, releases or wobbles, undo it and repeat the connection. Never rely on an anchor that does not hold firm under light tension.
Step 3: Route the Straps Correctly
Run the shoulder straps, waist belt and anchor strap through their guides. The anchor strap should lie flat against the carrier body rather than crossing over the baby’s face or neck area. Keep all webbing away from the baby’s airway, and make sure nothing presses into the baby’s legs or hips in a way that could affect comfort.
Step 4: Adjust for Your Body Before Putting the Baby In
Put the carrier on yourself first, without the baby. Set the waist belt so it sits on your hips, not your waist, and tighten the shoulder straps so the carrier rests high on your back. Then tighten the anchor strap until the carrier feels stable against your body without restricting your breathing or movement.
Step 5: Place the Baby and Re-Check the Anchor
With the carrier on, place your baby according to the manual’s instructions for their age and size. After the baby is in position, check the anchor again. Tightening adjustments made while the baby is in the carrier often need small corrections, so take a moment to recheck the anchor tension and all buckles before you walk.
Checking the Fit: Key Factors and Measurements
A good fit depends on your body and your baby’s size. The table below summarizes common checkpoints, but always defer to your model’s specifications.
| Factor | What to Check | Signs of a Good Fit |
|---|---|---|
| Baby’s position | Upright, seat supported, legs in a natural position | Baby’s chin is off the chest and the airway is clear |
| Anchor tension | Snug but not restrictive | Carrier moves with you without sagging or shifting |
| Waist belt height | Sits on hips | Weight is carried by hips, not shoulders |
| Shoulder strap length | Snug against the upper back | No gap between your back and the carrier |
| Baby’s face | Visible and unobstructed | You can see the baby’s face clearly at all times |
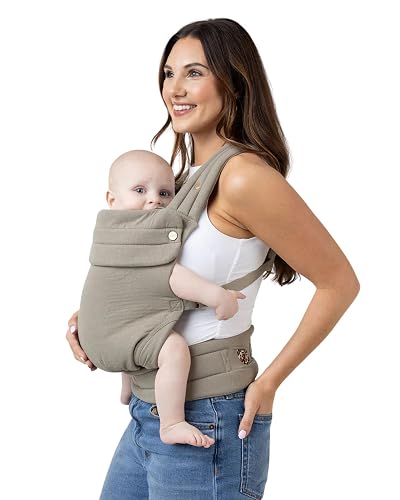
Pay close attention to baby’s airway at all times. The commonly taught guideline is the “TICKS” check: the baby should be Tight, In view at all times, Close enough to kiss, Keep chin off chest, and in a Supported position. Carriers with anchor systems do not replace this check, and the anchor should never be used to compensate for a baby who is positioned too low or too far down in the carrier.
Common Mistakes to Avoid
- Skipping the body fit step. If you do not adjust the carrier to your body first, the baby will hang at an uneven angle and the anchor will not hold properly.
- Over-tightening the anchor. A strap pulled too hard can press into the baby or restrict your movement. Aim for firm stability, not maximum tension.
- Leaving the anchor loose after putting the baby in. Weight shifts as the baby settles, so recheck the anchor and buckles after placement.
- Using an incompatible part. Anchor components are not always interchangeable between models or generations. Mixing parts can cause slippage.
- Ignoring wear. Check webbing, stitching and buckles regularly for fraying, cracks or distortion, and stop using the carrier if any part looks damaged.
- Wearing the carrier on the front for long periods without breaks. Even a well-fitted carrier can cause back or hip strain if worn for hours without adjustment or rest.
Tips for Everyday Use
- Re-check the anchor every time you put the carrier on, since daily use can loosen fittings.
- Make small adjustments rather than full re-setups when you switch between carrying positions.
- If your baby falls asleep, gently check their position again, as sleeping babies tend to slump.
- Keep the manual handy until the setup feels routine. Many parents find the first two weeks the trickiest.
- If you carry for long periods, plan breaks and support your back with good posture when bending.
Recommended gear
Some accessories can make carrying with an anchor system easier and more comfortable. Choose items that match your model and always check compatibility first.
- Carrier-compatible lumbar support insert: Adds cushioning for longer walks, though it should be confirmed as compatible with your model before use. View on Amazon
- Full-length mirror or tripod phone mount: Useful for checking strap routing and anchor placement from behind. View on Amazon
- Replacement anchor or buckle set from the manufacturer: Use only official parts that match your model. View on Amazon
FAQ
Do all Baby Bjorn carriers come with an anchor?
No. Anchor-style features appear on some models and not others. Check your product listing or manual to confirm whether your carrier includes this component.
Can I use the anchor with a newborn?
Many carriers specify a minimum weight or age for newborn use, and some require an infant insert. Follow the manufacturer’s stated minimums and use any included insert as directed. Consult your pediatrician if you have questions about your newborn’s readiness.
How tight should the anchor be?
It should feel firm and stable without pressing into the baby or restricting your breathing. You should be able to move, bend and walk normally.
What if the anchor keeps slipping?
Stop using the carrier and recheck the connection, routing and buckle alignment against the manual. If the anchor still slips, contact the manufacturer, as the part may be worn or the setup may be incorrect for your model.
Is an anchor a substitute for a safe baby position?
No. The anchor helps with stability, but baby’s airway, positioning and visibility must always be checked. Use the TICKS guideline and reassess after every adjustment.
Can I wash the carrier with the anchor attached?
Check the care label and manual. Many manufacturers recommend removing removable parts before washing, and some components should not go in a machine.
Where can I find a replacement manual?
Manufacturer websites usually host downloadable PDF manuals for each model. Refer to Baby Bjorn Carrier Original Manual (2026): Where to Find It and How to Use It for guidance on locating the right version.
How does the anchor compare with other carriers?
Comparing features across brands can help you choose the right setup for your lifestyle. For a side-by-side look at two popular options, see Ergo Baby or Baby Bjorn Carrier (2026): Which Is Better for Daily Use?.
Conclusion
Using a Baby Bjorn carrier with anchor comes down to three things: connecting the anchor correctly, fitting the carrier to your body before adding your baby, and rechecking the setup every time you put it on. Follow your model’s manual, keep baby’s airway visible and supported, and stop if anything feels loose or damaged. If you have specific health or safety concerns, consult your pediatrician or a certified carrier fitting specialist.
Ready to choose one?
About Graham Fisher
Graham Fisher is part of our editorial team and reviews and edits our baby gear guides, checking product details against manufacturer specifications and owner feedback.









Write Your Review
No reviews yet. Be the first to share your experience!