 By Graham Fisher
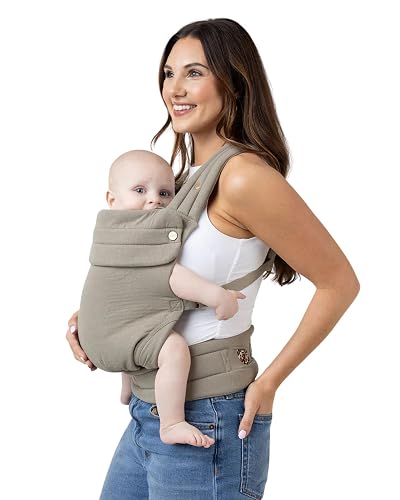
A manduca baby carrier forward facing setup lets you carry your baby facing outward so they can see the world as you walk. This guide explains when a baby is ready for forward-facing carry, how to position them correctly in the carrier, and the checks that keep their airway clear and their hips supported. Carrier instructions change between models, so always follow the manufacturer’s manual for your specific version.
Why Forward-Facing Carry Needs Extra Care
Forward-facing carry changes how a baby sits in the carrier. Instead of resting against your chest, the baby’s back is supported by the carrier’s back panel while their face points outward. That means the baby’s head and neck have less natural support, and their weight pulls more heavily on the seat and the crotch strap. Safety guidance from pediatric and babywearing organizations consistently recommends that forward-facing carry be used only when the baby has solid head and neck control and can hold their head upright without wobbling.
Shopping for one? See our guide: Baby Bjorn Baby Carrier Review: Pros and Cons.
Because the baby’s airway is more exposed in this position, you should also be able to see their face at all times. If you cannot see their face by glancing down, the position is not safe.
Step 1: Confirm Your Baby Is Ready
Most manufacturers specify a minimum weight and developmental stage for forward-facing use. Many standard structured carriers list a starting weight in the range of roughly 15 to 20 pounds for inward-facing carry, and forward-facing is typically permitted only once the baby can hold their head up steadily and sit with support. Check the exact minimum in your model’s manual. Babies who are still floppy, sleepy, or unable to keep their head upright should stay in a front inward-facing position.
Before you begin, check these readiness signs:
- Head and neck are steady when the baby is upright, with no sudden dropping.
- The baby can sit with their back fairly straight when supported.
- The baby meets the minimum weight listed in the carrier manual.
- The baby is alert enough to tolerate the outward view without falling asleep with their chin on their chest.
Step 2: Gather the Right Tools and Setup Items
You do not need special equipment, but a few items make the setup smoother and safer:
- A mirror or a second person to check positioning the first few times.
- The carrier’s manual or the printed fit guide from the manufacturer.
- A clean, flat surface such as a bed or couch for practicing the buckle sequence.
- A pediatric or lactation professional to consult if you have questions about your baby’s neck or hip development.
Step 3: Set the Carrier Up for Outward Carry
Adjust the Waist Belt and Shoulder Straps
Start with the carrier fully loosened. Fasten the waist belt snugly around your hips, not your waist, so the weight sits on your pelvis. Tighten the shoulder straps so the carrier sits high on your back and does not sag. Many wearers find that the shoulder straps should lie flat without digging in once tightened.
Set the Panel Height for the Baby
Adjust the panel so the top edge sits just below the baby’s shoulder blades when they are seated. This keeps the baby’s head at a level where you can kiss the top of it, which helps you monitor their breathing and position.
Set the Leg Opening
Confirm the leg openings are roughly the width of the baby’s thighs. Their knees should sit slightly higher than their bottom, in the “M” position, with the carrier supporting the back of the thighs to the knee. Never let the fabric press into the back of the knees.
Step 4: Position the Baby Facing Outward
With the carrier on, lift the baby so their bottom rests in the seat and their legs pass through the leg openings. Bring the baby’s back against the panel and guide their arms through the arm openings. Then tighten the carrier so the baby is held snugly against your chest, with no slack in the fabric at the back.
The baby’s face should be clearly visible to you. Their chin should be off the chest, and their head should be upright. If their head tips forward, pull the carrier higher or tighten the panel, then recheck.
Use the Hood or Head Support Carefully
Some carriers include a hood or head support for outward carry. Use it only as the manufacturer directs, and never let the hood or fabric cover the baby’s face or block airflow.
Step 5: Run the Fit and Safety Checks
Once the baby is in place, run through a quick check every time you put them in the carrier. A useful memory aid is the TICKS acronym widely used in babywearing safety education:
- Tight: the carrier holds the baby snugly, with no slack.
- In view at all times: you can see the baby’s face by looking down.
- Close enough to kiss: the baby’s head is close enough to kiss without bending your neck.
- Keep chin off chest: the airway stays open.
- Supported back: the baby’s back is supported in a natural curve.
Recheck the buckles, straps and leg openings after you walk a few steps, because fabric often shifts with movement.
Recommended gear
A few accessories can improve comfort and fit for outward carry, though none replace the carrier’s manual:
- A small hand mirror for checking the baby’s face position while you walk. View on Amazon
- A lumbar or hip support for long walks, which can reduce strain on your lower back. View on Amazon
- A breathable sun hat sized for toddlers, which helps protect a forward-facing baby from glare. View on Amazon
Common Mistakes to Avoid
- Carrying a baby forward facing before they have steady head control.
- Letting the baby slump with their chin on their chest.
- Wearing the waist belt too high on the waist instead of the hips.
- Forgetting to recheck the carrier after walking, bending or climbing stairs.
- Leaving a sleeping baby in a forward-facing position for long stretches.
Tips for Longer Outings
Forward-facing carry works well for short walks, shopping trips and sightseeing. For longer outings, take breaks to stretch, rebalance the baby, and check their position. Babies often prefer to face in only for brief periods and may want to return to a front inward-facing position when they are tired or hungry. Read more about wearing carriers for longer days in our guide to Babywearing in Hot Weather: Carriers, Fabrics and Precautions and check your general carrier options in Baby Carrier Types: Structured, Wrap, Ring Sling and Backpack.
If you are comparing carriers before you buy, see Best Baby Carriers: 5 Soft Structured Carriers Compared and the Soft Structured Carrier Fit Guide for sizing advice. For a wider look at how to wear any carrier safely, the step-by-step walkthrough in How to Wear Baby Carrier Safely: A Step-by-Step Guide is a good companion to this article.
FAQ
At what age can I use a manduca baby carrier forward facing?
There is no single age that applies to every baby. Readiness depends on head and neck control, the ability to sit with support, and the minimum weight listed in your carrier’s manual. Many babies reach this stage after several months, but check your model’s guidance.
How do I know if my baby is too low in the carrier?
If you have to look down steeply to see the baby’s face, or if the baby’s chin is touching their chest, the carrier is likely too low. Raise the panel and tighten the straps, then recheck the fit.
Can my baby sleep forward facing?
Sleeping in a forward-facing position is not recommended. A sleeping baby’s head can drop forward and restrict breathing. If your baby falls asleep, reposition them facing you or take them out of the carrier.
Should I use a forward-facing carrier for long walks?
Forward-facing carry is best for short periods. Longer walks often work better with the baby facing inward, where their head and neck have more support against your chest.
How often should I check the buckles and straps?
Check them every time you put the baby in the carrier and again after the first few minutes of walking. Fabric and buckles can loosen with movement.
Does the carrier need to be washed or inspected?
Follow the washing instructions in the manual. Inspect the straps, stitching and buckles regularly for fraying or damage, and stop using the carrier if you find any problems.
Should I talk to a professional before forward-facing carry?
Yes, if your baby was born early, has a medical condition, or has any concerns about hip or neck development. A pediatrician or certified babywearing educator can confirm readiness.
Conclusion
Using a manduca baby carrier forward facing is safe when your baby has solid head control, meets the minimum weight in the manual, and stays visible and upright. Set the carrier up for outward carry, position the baby with their back supported and chin off the chest, and run the TICKS check every time. Keep forward-facing sessions short, and return to inward-facing carry when your baby gets tired.
Ready to choose one?
About Graham Fisher
Graham Fisher is part of our editorial team and reviews and edits our baby gear guides, checking product details against manufacturer specifications and owner feedback.









Write Your Review
No reviews yet. Be the first to share your experience!